It’s only fitting that someone that educates others on the benefits of stretching have her very own BOO-tiful Halloween Flexy Mummy. I’m sure if hubby had a say to what I should make, a mummy wouldn’t be his first choice of Halloween icons that best represented me.
The cold temperature and rain kept us in for the better part of the weekend so as ‘Bug’ napped I ditched everything else I had on my “to do” list and jumped on Pinterest. Love that site by the way, so much so I created a Halloween Pinterest board.
Inspired by Family Chic’s post on Movable Mummies, here’s the how to part of the post for you to create your own Boo-tiful Mummy.
How to make a Movable Mummy
Total time = 60 minutes
What you’ll need
- 4 pipe cleaners
- Muslen (cut or torn into 1/2 & 1″ strips)
- Patience
Steps
- Wrap the end of the pipe cleaner around the tip of your finger to make the shape of the head.
- Double loop midway down the pipe to form the pelvis and one leg.
- With another pipe cleaner (#2) double loop it midway between the head and pelvis to form the arms.
- With pipe cleaner #3 double loop over the pelvic loop to form the second leg.
- Cut the end off the extra piece.
- Pipe cleaner #4, wrap continuously around the initial head loop for more bulk and width. Curl the ends of each limb to form hands and feet.
- Have your muslin strips tied together and ready to start forming your mummy.
- Loop and ties the first piece of muslin around the head then begin wrapping the rest around the pipe cleaner form.
- This is what mid-way should look like.
- Begin looping over and through the legs of the mummy.
- Tie the end piece to anther piece of muslin behind the mummy.
- HAPPY HALLOWEEN

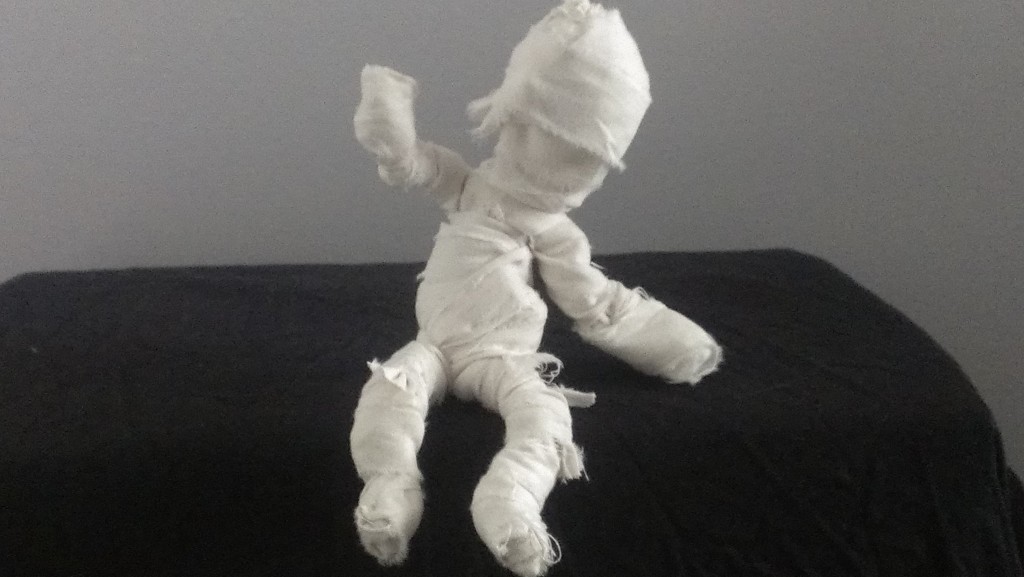
And VOILA my BOO-tiful Flexy Mummy. Maybe I could use it for my program demo’s, hmmmm, this may not be the last time you see this mummy in my posts.
Do you have a favorite Halloween craft?
Leave a Reply
You must be logged in to post a comment.